Your highest energy costs likely come from hidden waste, not from what you actively use. Significant savings are found by eliminating the energy your home loses 24/7.
- Structural air leaks and poor insulation are often the biggest sources of energy loss.
- “Vampire” electronics in standby mode can secretly add over $100 to your annual bill.
- Optimizing your existing heating and cooling systems offers a faster ROI than expensive upgrades.
Recommendation: Before investing in new technology, conduct a systematic hunt for your home’s “efficiency blind spots”—the leaks, phantom loads, and thermal bridges that are silently draining your wallet.
That moment when you open your utility bill and your jaw hits the floor. It’s a feeling homeowners know all too well, especially as energy costs continue to climb. The immediate reaction is to follow the standard advice: turn off lights, take shorter showers, and unplug every charger in sight. While these actions have merit, they are often a drop in the ocean, addressing the symptoms rather than the root cause of your high bills. They focus on what you consciously use, but the real financial drain often comes from what your house wastes when you’re not even paying attention.
The inconvenient truth is that your home is likely bleeding energy from dozens of invisible wounds. These are the structural inefficiencies and “energy parasites” that work against your heating and cooling systems around the clock. The key to a major reduction in your bill isn’t just about using less energy; it’s about stopping the constant, silent waste. This requires a shift in mindset: from random acts of conservation to a systematic hunt for the hidden culprits.
But what if the most impactful changes weren’t about buying expensive solar panels or brand-new appliances? What if the secret to a 30% reduction lies in identifying and sealing the invisible leaks, outsmarting the phantom power draws, and making strategic choices about your existing systems? This guide provides a practical, efficiency-focused roadmap. We will move past the generic tips and dive directly into the high-impact strategies that target the biggest sources of waste in your home. We’ll explore how to find and fix structural weaknesses, expose the devices that drain power on standby, and make informed decisions about heating and cooling that can save you hundreds, starting now.
This article provides a structured approach to locating and eliminating the most significant sources of energy waste in your home. The following sections will guide you through a practical audit, from your attic to your wall outlets, to achieve real savings.
Summary: A Homeowner’s Guide to Slashing Energy Costs
- Why Your Attic Insulation Is Useless If You Don’t Seal Air Leaks First?
- How to Find Thermal Bridges in Your Walls Using an Infrared Camera?
- Heat Pump vs Gas Furnace: Which Is Cheaper to Run in Cold Climates?
- The Standby Power Devices That Are Secretly Adding $100 to Your Annual Bill
- How to Schedule Your Smart Thermostat to Save Money While You Sleep?
- How Choosing Direct Flights Reduces Your Travel Carbon Footprint by 40%?
- Why Physical Record Keeping Costs Your Business $2,000 Per Year in Space Alone?
- Why Triple Glazing Might Be Overkill for Homes in Mild Climates?
Why Your Attic Insulation Is Useless If You Don’t Seal Air Leaks First?
You’ve invested in thick, fluffy insulation for your attic, believing you’ve put a warm hat on your house. But if you haven’t addressed air leaks first, it’s like wearing a winter coat that’s full of holes. Insulation works by trapping pockets of air, slowing the transfer of heat. However, it is not an air barrier. When air can move freely through gaps and cracks in your attic floor, it bypasses the insulation entirely, rendering it largely ineffective. This process, known as “air convection,” is a primary driver of energy loss in homes. Your heated or cooled air is literally being sucked out through these unsealed openings.
The scale of this problem is staggering. Studies confirm that up to 33% of a typical home’s heat loss occurs through air leaks, not through poorly insulated surfaces. For perspective, the cumulative effect of these small gaps can be equivalent to leaving a window wide open all year round. The average home has enough air leakage to equal a 2-foot-square hole in the wall. Sealing these leaks is the most critical first step in making your home efficient. It ensures that your insulation can do its job of trapping air, rather than just watching as conditioned air escapes into the atmosphere.
Common culprits for attic air leaks include gaps around recessed lighting, plumbing stacks, electrical wiring, attic hatches, and chimneys. A simple DIY method to find these is the smoke test:
- On a cool, windy day, turn off your HVAC and close all windows and doors.
- Carefully light an incense stick and hold it near suspected leak points in your attic or around fixtures in the ceiling below.
- If the smoke is drawn towards the gap or wavers significantly, you’ve found an air leak that needs to be sealed with appropriate caulk or spray foam.
Prioritizing this sealing process before adding more insulation is non-negotiable for anyone serious about cutting energy costs. It’s the difference between a home that’s truly insulated and one that’s just decorated with insulating material.
How to Find Thermal Bridges in Your Walls Using an Infrared Camera?
Even in a well-insulated wall, there are hidden highways for heat to escape. These are called thermal bridges, and they occur where materials with poor insulating properties—like wood studs, steel beams, or concrete fasteners—interrupt the continuous layer of insulation. A thermal bridge acts like a pipe, conducting heat directly through your wall and out of your home in winter, or into your home in summer. Because these are structural components, they are completely invisible to the naked eye, making them a particularly sneaky form of energy waste.
The most effective way to expose these efficiency blind spots is with an infrared (IR) camera. These devices detect temperature differences on a surface and display them as a color gradient. In winter, a thermal bridge will appear as a cold spot (often blue or purple) on your interior walls, showing exactly where heat is being lost. In summer, it will show up as a hot spot (yellow or red). While professional energy audits use high-end equipment, affordable IR camera attachments for smartphones have made this technology accessible to homeowners.

As the image demonstrates, using an IR camera reveals a hidden world of thermal inefficiency. By scanning your walls, ceilings, and floors, you can create a precise map of where your home’s thermal envelope is compromised. This allows you to move from guesswork to a data-driven plan. Instead of wondering why a room feels drafty, you can pinpoint the exact studs or uninsulated corners responsible for the discomfort and energy loss.
Your Home IR Audit Checklist: Finding Hidden Leaks
- Ensure a significant temperature difference (at least 15°F or 8°C) between inside and outside. Scan after sunset for best results.
- Check wall studs and the headers above windows and doors, which are classic locations for thermal bridging.
- Examine the corners where walls meet each other, the floor, and the ceiling, as these are common spots for insulation gaps.
- Look for distinct temperature variations around electrical outlets and switch plates on exterior walls.
- Scan the seals around all windows and doors to detect cool drafts indicating air infiltration.
Heat Pump vs Gas Furnace: Which Is Cheaper to Run in Cold Climates?
For decades, the gas furnace has been the undisputed king of heating in cold climates. The logic was simple: when temperatures plummet, you need the raw power of combustion to stay warm. However, modern heating technology has completely upended this assumption. Today’s cold-climate heat pumps are not only viable in freezing temperatures but are often significantly cheaper to operate than their gas-burning counterparts, challenging a long-held belief about home heating.
The key difference is efficiency. A high-efficiency gas furnace can convert about 98% of its fuel into heat. This sounds impressive, but a heat pump doesn’t create heat; it *moves* it. Even in cold air, there is thermal energy, and a modern heat pump can extract it and transfer it inside your home. This process is so efficient that modern cold-climate heat pumps achieve over 200% efficiency even at freezing temperatures. For every unit of electricity they consume, they deliver two to four units of heat, a performance metric known as the Coefficient of Performance (COP). According to IRS data on energy-efficient home improvements, heat pumps alone can save households up to $500 annually, and a federal tax credit can cover up to 30% of the installation cost (maximum $2,000).
This table breaks down the operational differences in a typical home, showing why the long-term running costs often favor heat pumps, even with higher upfront investment.
| System Type | Maximum Efficiency | Annual Operating Cost (Average Home) | Carbon Footprint |
|---|---|---|---|
| Cold-Climate Heat Pump | 200-400% (COP 2-4) | $500-$900 | Low (depends on grid) |
| High-Efficiency Gas Furnace | 95-98% | $600-$1200 | Higher direct emissions |
| Dual Fuel System | Variable | $450-$800 | Moderate |
While a gas furnace might still have an edge in the most extreme sub-zero conditions, many homeowners are opting for a “dual fuel” system. This combines a heat pump with a small gas furnace, allowing the hyper-efficient heat pump to handle over 90% of the heating needs, with the furnace only kicking in on the absolute coldest days of the year. This provides both peace of mind and maximum operational savings.
The Standby Power Devices That Are Secretly Adding $100 to Your Annual Bill
You turn off your TV, your computer, and your coffee maker, but are they truly off? In our modern, connected homes, dozens of devices exist in a state of perpetual standby, silently sipping electricity 24/7. This phenomenon, known as phantom load or vampire power, is a significant and often completely overlooked energy parasite. While a single device might only draw a few watts, the cumulative effect of all your electronics can be substantial, accounting for up to 10% of your total electricity usage.
The U.S. Department of Energy has found that homeowners can save between $100 and $200 each year simply by eliminating these phantom loads. The culprits are often the devices we least suspect, designed for our convenience. Anything with a remote control, an “instant-on” feature, a continuous digital display, or an external power brick is a likely suspect. These features require a constant stream of power to be ready for your command, and that readiness comes at a direct cost on your utility bill.
Identifying these energy vampires is the first step in a systematic hunt to reclaim that wasted money. While you can use a simple watt-meter to test individual devices, many of the worst offenders are well-known. Here are some of the most common unexpected energy parasites lurking in your home:
- Cable/Modem Router Combos: These network devices are always on, drawing 10-20 watts continuously to maintain your internet connection.
- Game Consoles: Modern consoles with “instant-on” modes can use 10-15 watts in standby, ready to download updates or launch a game in seconds.
- Smart Speakers and Displays: Your voice-activated assistant is always listening, consuming 3-8 watts constantly just to be prepared for your next command.
- Coffee Makers with Clocks: That convenient clock on your coffee machine can draw 2-5 watts, 24 hours a day, just to tell you the time.
- Digital Picture Frames: Even when not actively cycling through photos, these frames can use 5-10 watts simply by being plugged in.
The solution is not to live in the dark ages, but to be strategic. Grouping entertainment center devices onto a single smart power strip allows you to cut power to all of them with one click or a voice command. For standalone items like coffee makers or chargers, simple outlet timers can ensure they only draw power when you actually need them. This targeted approach eliminates waste without sacrificing convenience.
How to Schedule Your Smart Thermostat to Save Money While You Sleep?
Your thermostat is the brain of your home’s largest energy consumer: the HVAC system. Leaving it at a single temperature 24/7 is one of the most common and costly energy-wasting habits. There’s no reason to pay to keep your home at peak comfort while you’re asleep under warm blankets or away at work. A smart thermostat allows you to automate temperature adjustments, aligning your energy use with your actual daily life and creating significant savings with zero effort after the initial setup.
The principle is simple: a “setback” is a period where you intentionally set your thermostat to a more energy-efficient temperature (lower in winter, higher in summer). Doing this for an extended period, like the eight hours you’re asleep, dramatically reduces your HVAC system’s workload. The impact is significant: according to the Natural Resources Defense Council, you can achieve up to a 10% annual heating bill reduction just by setting your thermostat 10-15 degrees Fahrenheit lower overnight. A smart thermostat makes this effortless by allowing you to program these changes in advance.
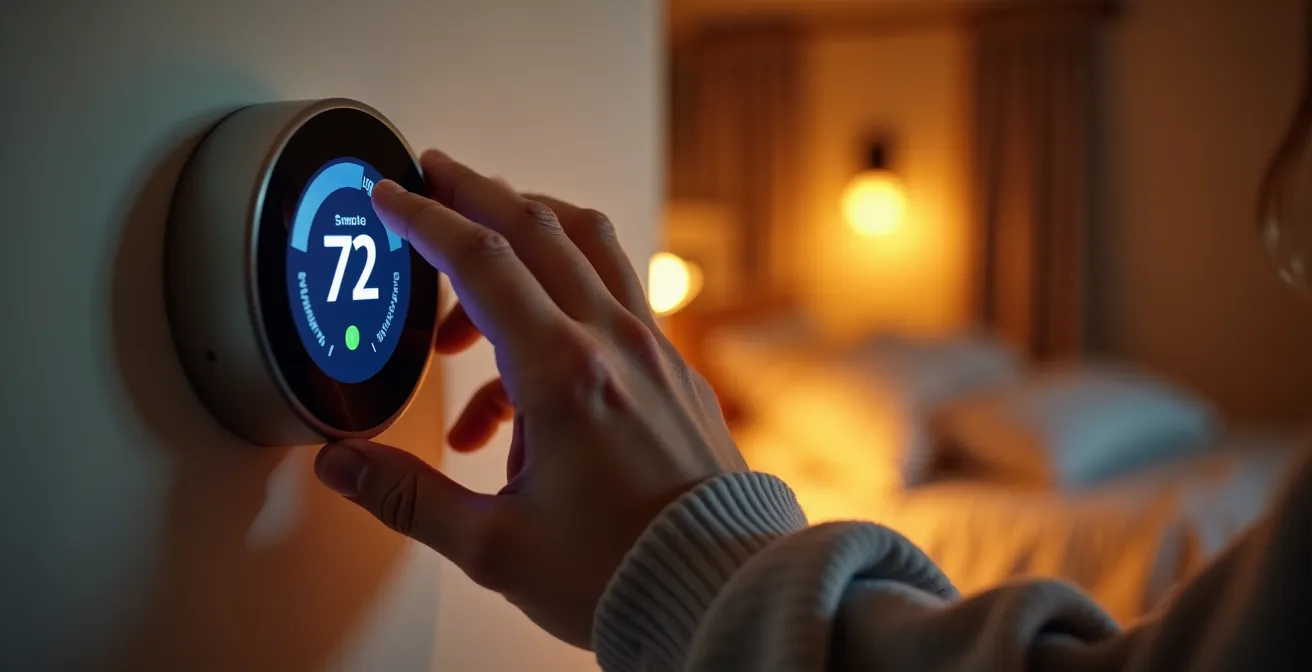
Programming a schedule is not about sacrificing comfort; it’s about optimizing it. A well-programmed thermostat, like the one being adjusted in the image, can begin warming the house up 30 minutes before your alarm goes off, so you wake up to a comfortable environment. The key is to create zones of time that reflect your routine: sleeping, waking up, away from home, and returning in the evening. Most smart thermostats also offer “geofencing,” using your phone’s location to automatically switch to an energy-saving “away” mode when you leave and return to your preferred comfort setting as you approach home.
A typical nighttime schedule for winter might look like this: set your thermostat to 68°F (20°C) during evening hours. At 10 PM, have it automatically drop to 60°F (15.5°C). Then, at 6 AM, schedule it to return to 68°F. This simple eight-hour setback ensures you’re not paying to heat an empty house or one where everyone is asleep, directly translating into a lower monthly bill.
How Choosing Direct Flights Reduces Your Travel Carbon Footprint by 40%?
The principle of choosing a direct flight is about efficiency: takeoffs and landings consume a disproportionate amount of fuel. The same logic can be applied to your home’s energy consumption. The further your electricity has to travel from a massive, centralized power plant to your home, the more energy is lost along the way in transmission lines. This concept of “energy travel miles” is a hidden inefficiency in our power grid. Just as a direct flight is more efficient, sourcing your energy locally is a powerful way to reduce your home’s overall carbon footprint and support a more resilient grid.
One of the most effective ways to reduce your home’s energy travel miles is by subscribing to a community solar program. These programs allow you to benefit from a large, local solar array built in your area. You “subscribe” to a portion of the array’s output, and you receive a credit on your electricity bill for the power it generates. You get the financial and environmental benefits of solar without having to install panels on your own roof. This not only reduces transmission losses but also protects you from the price fluctuations of fossil fuels.
This strategy is part of a broader approach to reducing the “distance” energy travels inside and outside your home. For example, installing a small, point-of-use electric water heater in a distant bathroom can be far more efficient than forcing your main water heater to pump hot water across the entire house, losing heat along the way. Your home becomes a mini-grid, generating and using power with maximum efficiency.
Consider these strategies to reduce your home’s “energy travel miles”:
- Community Solar: Research local programs to subscribe to clean energy generated in your neighborhood.
- Point-of-Use Water Heaters: Install small, tankless heaters for distant faucets to eliminate heat loss in long pipe runs.
- Battery Storage: If you have solar panels, adding a battery allows you to store your own locally generated energy for use at night, achieving true energy independence.
- Time-of-Use Plans: Align your heavy energy consumption (like EV charging or laundry) with times when the grid has the most renewable energy available.
By thinking of your energy in terms of its journey, you can make smarter, more efficient choices that have a real impact on your bill and the environment.
Why Physical Record Keeping Costs Your Business $2,000 Per Year in Space Alone?
In the business world, relying on physical record-keeping—endless filing cabinets and boxes of paper—is an obvious inefficiency. It’s slow, cumbersome, and expensive. The same analogy applies to how most people manage their home energy use. Relying on the “physical record” of a monthly paper bill is an outdated strategy. It tells you the total cost, but it gives you zero insight into *how* and *when* you used that energy. To make real, targeted cuts, you need to switch to digital record-keeping: leveraging the data from your smart meter.
A smart meter is more than just a digital version of the old spinning-dial meter. It’s a powerful data-gathering tool that records your electricity consumption in near real-time, often in 15-minute or one-hour intervals. Most utility companies provide an online portal where you can access this granular data. This is your “digital record,” and it allows you to become a detective in your own home. By analyzing your usage patterns, you can uncover the energy parasites that are impossible to spot otherwise.
For example, a quick look at your hourly usage can be incredibly revealing. If you see a consistent, high baseline of energy use in the middle of the night when everyone is asleep, you have definitive proof of a significant phantom load. Analyzing your smart meter data can show that a steady 300-watt draw between 3 AM and 7 AM is from your entertainment center and network gear on standby. This data transforms an abstract problem into a concrete one you can solve by installing a smart power strip. It’s the difference between guessing and knowing.
This digital approach allows you to test the impact of your changes. Unplug a suspect appliance for a day and check your smart meter data the next morning to see the drop in your baseline consumption. The immediate feedback is a powerful motivator and proves which actions are delivering the biggest savings. Moving from the “physical record” of a monthly bill to the “digital record” of your smart meter data is the single most important step in taking professional, analytical control of your energy costs.
Key Takeaways
- The biggest energy savings come from fixing hidden structural issues like air leaks and thermal bridges, not just changing daily habits.
- “Vampire power” from electronics on standby is a major, silent cost; use smart power strips to eliminate it.
- Optimize what you already have—like programming your thermostat—before investing in expensive upgrades for the best return on investment.
Why Triple Glazing Might Be Overkill for Homes in Mild Climates?
When hunting for energy savings, it’s easy to get caught up in the appeal of high-tech, expensive upgrades. Triple-pane windows, with their extra layer of glass and insulating gas, are often marketed as the ultimate solution for an energy-efficient home. While they offer superior performance in extreme cold, for a homeowner in a mild or mixed climate, they often represent a case of diminishing returns. The significant upfront cost may never be recouped in energy savings, making it a poor strategic investment compared to other, more foundational upgrades.
The truth is, windows are rarely the biggest source of energy loss in a home. As we’ve seen, air leakage and poor attic or wall insulation are typically much larger problems. Investing thousands of dollars in triple-pane windows before you’ve sealed your home’s envelope is like installing a high-security vault door on a tent. It’s a technologically advanced solution applied to the wrong problem. The payback period for triple-pane windows can stretch into decades, whereas more fundamental improvements often pay for themselves in under 10 years.
Sealing and insulating is often the most cost effective way to improve efficiency and comfort
– ENERGY STAR, Energy Savings at Home Guide
Professional energy audits consistently show that making targeted upgrades identified in an assessment can save 5-30 percent on monthly energy bills. These audits almost always prioritize air sealing and insulation over window replacement in mild climates because they deliver a much faster and more substantial return on investment.
This comparison table puts the costs and benefits into perspective, highlighting where your money is most effectively spent for the quickest payback.
| Upgrade Option | Typical Cost | Annual Savings | Payback Period |
|---|---|---|---|
| Window Film (Low-E) | $50-100/window | $20-40/window | 2-5 years |
| Double-Pane Upgrade | $300-800/window | $30-50/window | 10-25 years |
| Triple-Pane Upgrade | $800-1500/window | $35-60/window | 20-40 years |
| Air Sealing + Insulation | $2000-4000 total | $300-600/year | 3-10 years |
The data is clear: before considering a high-cost window replacement, ensure your home’s foundational elements—its air barrier and insulation—are performing optimally. For existing windows, applying low-emissivity (Low-E) film can be a highly cost-effective measure to improve their performance without the massive expense of a full replacement.
Your next step is to conduct a DIY energy audit this weekend. Use this guide to hunt down the air leaks, identify the energy vampires, and analyze your smart meter data to find your home’s biggest efficiency blind spots and start saving immediately.