Contrary to popular belief, generous seam allowance isn’t primarily for future alterations—it’s the hidden structural engineering that dictates if a garment will fit, drape, and last.
- Wider allowances (1 to 1.5 inches) at key seams prevent twisting and allow the fabric to drape correctly over the body’s curves.
- The type of seam finish, like French seams on bias cuts or reinforced seams at stress points, is a direct indicator of long-term durability.
Recommendation: Before buying, always check the center back and side seams. If the allowance is less than 5/8 of an inch, the garment lacks the structural integrity for a lasting fit.
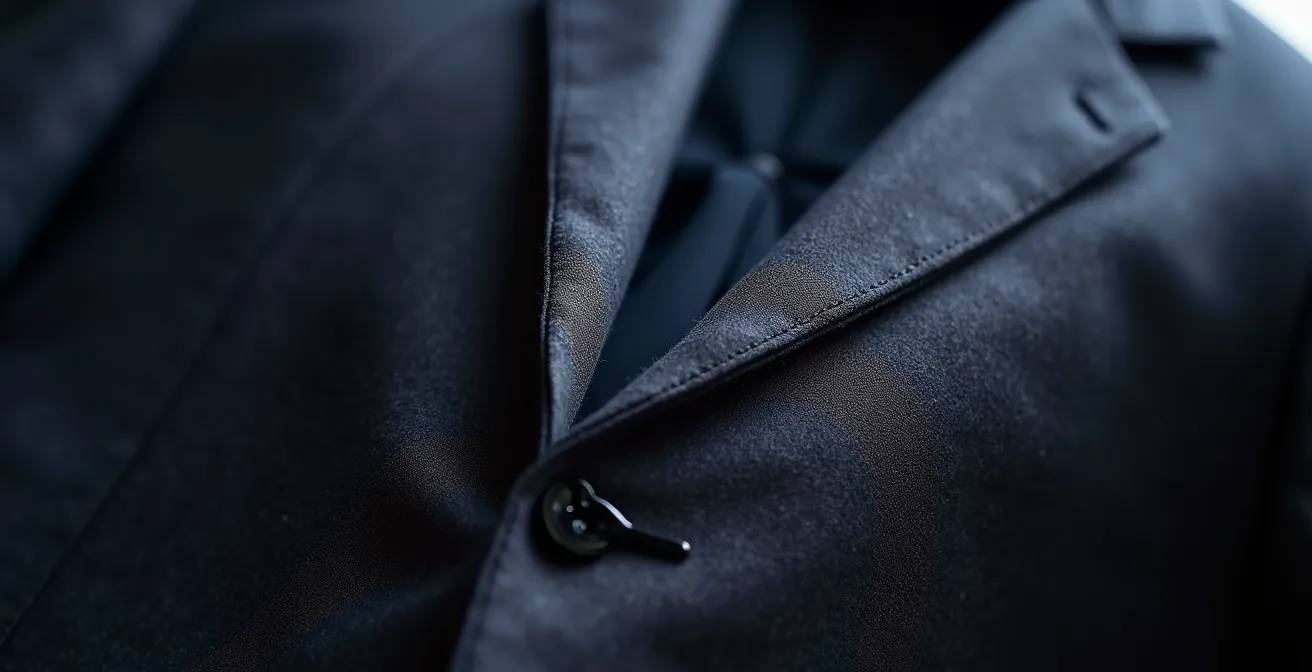
You have experienced the quiet frustration. The new pair of trousers that, after a single wash, develops a persistent twist in the leg seam. The blazer that feels restrictive across the shoulders, pulling uncomfortably with every movement. The common response is to blame the fit or the fabric, but the true culprit often lies hidden inside the garment, in a detail most consumers are taught to ignore: the seam allowance.
Conventional wisdom tells you to look for neat stitches or a high stitch count. While not incorrect, this is surface-level analysis. It is akin to judging a building by its paint job. The real measure of quality—the factor that determines whether a garment will hold its shape, move with your body, and endure for years—is its structural engineering. The seam allowance is not merely leftover fabric for a tailor to work with later; it is the foundational skeleton of the garment. It dictates tension distribution, drape, and the potential for a piece to adapt over its lifespan.
Thinking of seam allowance as an architectural blueprint fundamentally changes how you assess clothing. It is the difference between buying a disposable trend and investing in a piece with integrity. This guide will deconstruct this principle from a tailor’s perspective. We will examine why a “straight” pant isn’t always straight, how a dress achieves its graceful drape, and what invisible details justify a piece’s high price tag. You will learn to read the language of seams and identify true quality before you ever reach the checkout.
text
This article provides a structural breakdown of garment quality. Explore the sections below to understand how to evaluate clothing like an expert tailor.
Contents: A Structural Guide to Garment Quality
- Why a “Straight Cut” Pant Looks Different on Curvy vs Athletic Hips?
- How a Bias Cut Dress Skims the Body Without Clinging?
- Bust Darts vs Princess Seams: Which Offers Better Shaping for Large Busts?
- The Armhole Mistake Cheap Brands Make That Restricts Your Movement
- How to Tell if a Jacket Can Be Taken in Before You Buy It?
- The Hours of Labor Justification: Why One Jacket Costs $30,000?
- The Connector Failure That Ruins Cheap Modular Couches in 12 Months
- How to Build a Capsule Wardrobe That Lasts 5 Years Without Looking Dated?
Why a “Straight Cut” Pant Looks Different on Curvy vs Athletic Hips?
The term “straight cut” refers to the pattern pieces being cut parallel to the fabric’s grainline—the direction of the vertical threads. On a hanger, the leg appears perfectly straight. However, the human body is a series of curves. When a straight-cut pant is worn on a body with pronounced curves (curvy hips versus athletic hips), the fabric must stretch and contour. This is where the structural integrity of the seams is tested. If the seam allowance is minimal, the seam itself is put under immense tension. This tension causes the fabric to pull, leading to the characteristic twisting where the side seam migrates toward the front of the leg.
A high-quality garment anticipates this. It incorporates a more generous seam allowance, typically 1 to 1.5 inches at the side seams and inseam. This isn’t just for alterations; it provides the necessary “give” for the fabric to drape over the body’s topography without distorting the garment’s intended line. Furthermore, the quality of the stitching itself determines the seam’s ability to handle stress. Seam efficiency, a measure of a seam’s strength relative to the fabric’s strength, is a critical metric. While 60-80% seam efficiency is common in mass-market clothing, premium construction aims for 80-90%, ensuring the seam can withstand strain without puckering or breaking.
A well-constructed pant leg is an exercise in fabric engineering. The interplay between the rigid grainline and the expertly managed seam allowance is what allows it to appear straight while accommodating the body’s natural form. Without this internal architecture, the “straight cut” is merely a suggestion that fails upon first contact with a real body.
5-Point Seam Allowance Quality Check for Pants
- Check side seam width: Quality pants have a 1 to 1.5-inch allowance, providing room for the fabric to drape and for future alterations.
- Examine inseam finish: Turn the leg inside out. Look for clean finishes like bound or French seams, which indicate durability and prevent fraying.
- Test crotch seam reinforcement: The crotch is a major stress point. Gently pull at the intersection of the seams; you should feel no give, and ideally see bar tacks or double stitching.
- Verify grain alignment: The fabric’s weave should run perfectly parallel to the seam line. Any deviation indicates poor cutting and will lead to twisting.
- Perform the pull test: Gently tug the seams along the leg. A quality seam will remain flat and secure, with no gaping or visible thread stress.
How a Bias Cut Dress Skims the Body Without Clinging?
A bias cut is a technique where the fabric is cut at a 45-degree angle to its grainline. This unlocks the fabric’s inherent diagonal stretch, creating a fluid drape that follows the body’s contours. However, this same stretch is what makes bias-cut garments notoriously difficult to construct. The edges are unstable and prone to stretching and distorting during sewing. A cheap bias-cut dress will often cling in unwanted places or sag unevenly because its seams cannot manage these unique forces. The secret to a perfect bias cut lies in the drape dynamics engineered into the seams.
A master tailor uses specific seam finishes to control the bias’s volatility while preserving its fluidity. The French seam is a superior choice for this application. It’s a seam-within-a-seam, completely enclosing the raw fabric edges. This technique provides a clean, elegant finish that is also strong and stable, preventing the seam from stretching out of shape over time. It adds a slight, almost imperceptible weight to the seam line, which helps guide the drape of the fabric rather than letting it cling. This meticulous construction is a hallmark of high-end garments.
Case Study: French Seam Construction in Luxury Bias-Cut Garments
The construction of a luxury silk bias-cut dress demonstrates this principle perfectly. Tailors begin by placing the fabric pieces wrong sides together and stitching a very narrow seam. This is then trimmed, pressed, and enclosed within a second, slightly wider seam. As an expert from Sussex Seamstress explains, French seams are ideal for bias-cut dresses because this two-step process creates a beautiful, self-contained finish that prevents the delicate silk from fraying while adding just enough structure to control the drape and prevent unsightly clinging. This technique is time-consuming but essential for achieving the effortless skim that defines a quality bias garment.
Another crucial detail is the hem. A cheap bias dress will have a simple machine-stitched hem that can ripple or flip. A quality piece often features a deep, hand-rolled hem. This adds weight to the bottom edge, which uses gravity to pull the fabric gently downwards, ensuring the dress hangs beautifully and moves with grace.

As you can see, the elegance of a bias-cut dress is not an accident of the fabric; it is the result of deliberate engineering within its seams and hems. The allowance and finish work in concert to master the physics of the fabric, transforming potential chaos into controlled, fluid beauty.
Bust Darts vs Princess Seams: Which Offers Better Shaping for Large Busts?
Creating shape in a flat piece of fabric to accommodate the three-dimensional curves of the human body is a fundamental challenge of tailoring. For the bust, two primary methods are employed: darts and princess seams. A bust dart is a simple triangular fold sewn into the fabric to create a convex shape. It’s efficient and works well for small to average bust sizes. However, for a larger bust, a simple dart can create a pointed, conical effect that is often unflattering. It is a single-point adjustment for a complex, multi-dimensional curve.
A princess seam, by contrast, is a shaped seam that typically runs from the shoulder or armhole, over the apex of the bust, and down to the waist. Instead of pinching out a triangle of fabric, it divides the entire front panel of a garment into sections that are cut into precise curves and then sewn together. This creates a continuous, smooth contour that follows the shape of the body much more accurately than a dart can. For larger busts, this method is unequivocally superior for achieving a close, flattering fit without pulling or strain. The seam itself distributes the shaping, eliminating the “point” of a dart.
The structural difference also has significant implications for alterability, which is a direct reflection of the garment’s initial quality. The seam allowance in a princess seam offers vastly more potential for adjustment than a dart.
This comparative table, based on common tailoring practices, highlights the functional differences and shows why princess seams are the hallmark of quality construction for fitted bodices.
| Feature | Princess Seams | Bust Darts |
|---|---|---|
| Alteration Range | Up to 2 inches | Up to 0.75 inches |
| Seam Allowance Required | 5/8″ to 1″ | 3/8″ to 5/8″ |
| Shaping Precision | Continuous curve adjustment | Single point adjustment |
| Best For | Large bust alterations | Minor fit adjustments |
As detailed in tailoring guides, a princess seam can be let out or taken in along its entire length, allowing for nuanced adjustments to the entire curve of the bust. A dart, once sewn, offers very little room for change. Therefore, a garment with princess seams not only offers a better initial fit for a curvy figure but also signals a higher level of construction and built-in longevity.
The Armhole Mistake Cheap Brands Make That Restricts Your Movement
A jacket’s armhole, or armscye in tailoring terms, is one of the most complex areas of garment engineering. Its shape and placement dictate your entire range of motion. A common misconception is that a larger, looser armhole provides more freedom. The opposite is true. A high, close-fitting armscye allows the sleeve to move with the arm independently of the jacket’s body. You can raise your arms without the entire jacket lifting up. Conversely, the low, gaping armholes common in cheap, mass-produced jackets force the entire garment to move with your arm, severely restricting movement and creating a poor silhouette.
So why do cheap brands make this mistake? Because a low armscye is a one-size-fits-most solution. It accommodates a wider range of body types without the need for precise pattern making. A high armscye, however, must be perfectly shaped and positioned, which requires more skill and time. The seams that form the armscye in a quality jacket are not simple overlocked edges. They are often pressed open and taped to provide stability and prevent stretching, ensuring the armhole retains its precise shape over time. The quality of stitching is also paramount; textile quality experts recommend 12-14 stitches per inch for the fine fabrics used in jackets, ensuring a strong, stable seam.
Case Study: Armhole Construction in Bespoke vs. Ready-to-Wear
The difference is most apparent when comparing bespoke and ready-to-wear (RTW) construction. A bespoke jacket is built with generous seam allowances within the armscye and at the side seams. This allows a tailor to precisely adjust the size and position of the armhole for the wearer. RTW garments, designed for mass production, have minimal allowance. This fundamental difference in the “hidden” construction directly impacts the garment’s functionality and comfort, determining whether it feels like a second skin or a straitjacket.
The image below shows a deconstructed view of a quality jacket’s shoulder and armscye, revealing the complex layers and allowances that are hidden from view in the finished product.
The armscye is a clear indicator of a brand’s priorities. A low, poorly-finished armhole signals a focus on cutting costs and simplifying production. A high, clean, and well-constructed armscye signals a commitment to fit, movement, and quality engineering.
How to Tell if a Jacket Can Be Taken in Before You Buy It?
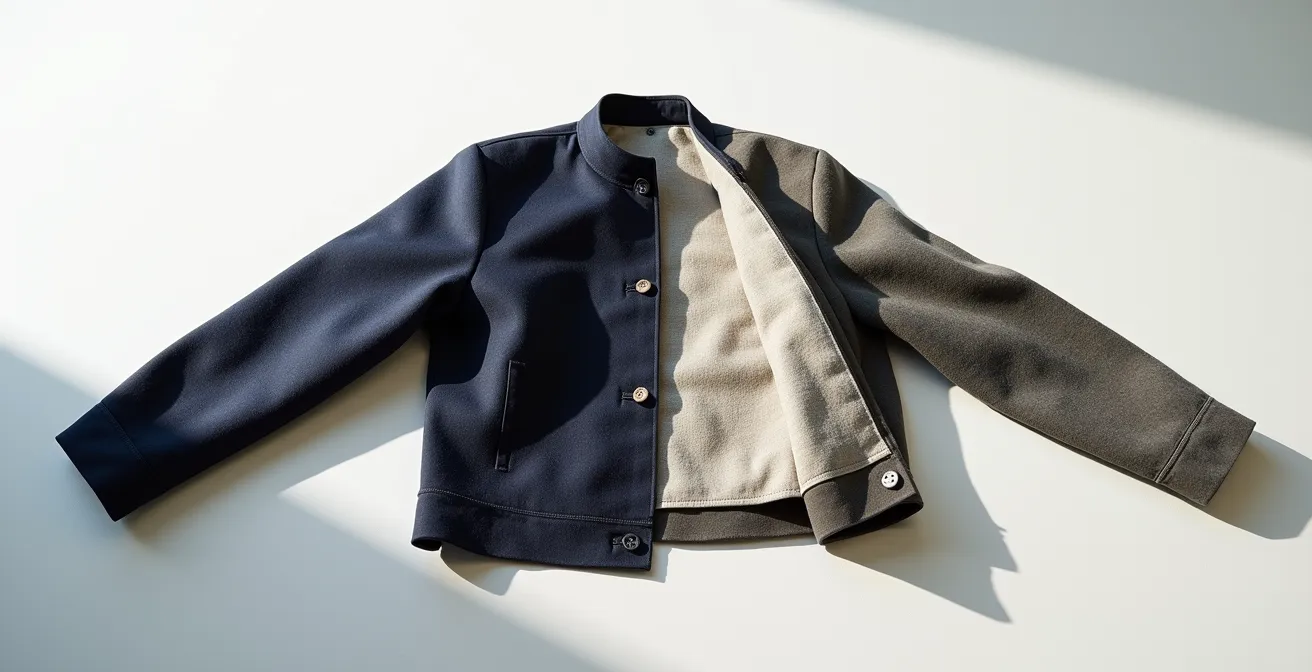
A key sign of a well-made jacket is its “alteration potential”—the built-in capacity to be tailored to a perfect fit. This potential is written directly into its seam allowances. A manufacturer that invests in quality understands that bodies change and that a perfect off-the-rack fit is rare. They build in extra fabric at critical seams as a mark of quality and a service to the customer. Conversely, a cheap jacket is made with the bare minimum of fabric, making significant alterations impossible. Knowing where to look for this hidden allowance is an essential skill for any discerning shopper.
Before purchasing a jacket, perform a quick internal inspection. The most important areas to check for alteration allowance are the center back seam and the side seams. Here is what to look for:
- Center Back Seam: Feel the seam running down the middle of the jacket’s back, underneath the lining. In a quality jacket, you should be able to feel a generous allowance of 5/8″ to 7/8″ of an inch on each side, offering a total potential to let the jacket out by up to 1.25 inches.
- Side Seams: Similarly, check the side seams under the arms. Again, a quality piece will have 5/8″ to 7/8″ of extra fabric.
- Lining: A quality jacket will often have a center-back pleat in the lining. This extra fold of fabric in the lining allows it to move and expand when the jacket’s outer shell is altered.
- Vents: If the jacket has vents at the back, inspect their construction. A separate underlap piece indicates it can be altered more easily than a simple slit.
The absence of these allowances is a major red flag. It indicates a garment built for disposability, not longevity. A professional tailor’s experience often confirms that what you see on the outside is no guarantee of what lies within.
My tailor was horrified to discover bad construction INSIDE the waistbands – inaccurately cut fabric, uneven stitching, crappy seams. She redid the waistbands. There was insufficient seam allowance or just a bad seam.
– A shopper’s experience, detailed on Recovering Shopaholic
The Hours of Labor Justification: Why One Jacket Costs $30,000?
The chasm in price between a $300 fast-fashion blazer and a $30,000 bespoke jacket can seem incomprehensible. The difference is not merely in the fabric quality, but in the thousands of hours of invisible, highly skilled labor invested in its internal structure. An expensive jacket is not just sewn; it is sculpted. The seam allowances play a starring role in this process, not as simple edges, but as active components in the jacket’s architecture.
In haute couture and bespoke tailoring, the internal components—the canvas, the lapel interfacing, the shoulder pads—are not fused with glue as they are in cheaper garments. They are attached with thousands of tiny, almost invisible hand stitches. This “pad stitching” creates a three-dimensional shape that is both structured and supple, allowing the jacket to mold to the wearer’s body. The seam allowances themselves are meticulously managed, pressed, and stitched by hand to support this shaping.
In haute couture or bespoke, the seam allowances inside the lapels and chest are ‘padded’ with thousands of tiny, invisible hand stitches that attach them to the internal canvas.
– Anuschka Rees, How to Assess the Quality of Garments Guide
Furthermore, the sheer amount of fabric used is different. As a standard, bespoke garments typically have 25-50% more seam allowance than their ready-to-wear counterparts. This extra material is a deliberate investment in longevity and perfect fit. It allows the tailor to perform multiple fittings, sculpting the jacket directly on the client’s body and leaving ample room for future adjustments as the client’s body or style evolves over decades. This is the definition of a lifetime investment piece, and its price reflects the materials, time, and artisanal skill required to create it.
The Connector Failure That Ruins Cheap Modular Couches in 12 Months
The principles of structural integrity are universal. The reason a cheap jacket fails at the shoulder seam is the same reason a cheap modular couch fails at its connection points: a disregard for the physics of stress points in favor of cutting costs. In both garments and furniture, these are the areas that bear the most load, tension, and movement. A quality manufacturer invests heavily in reinforcing these points; a cheap one uses the same weak construction everywhere and hopes for the best.
Consider the crotch seam of a pair of trousers or the arm connection of a couch. In a cheap garment, the crotch seam might be a simple serged edge that will pull apart under strain. In a quality pair of jeans, it will be a robust, flat-felled seam with bar tacks for reinforcement. Similarly, a cheap couch might connect its modules with a few staples, while a quality one will use glue, screws, and corner blocks. The philosophy is identical: identify the weak points and over-engineer them for durability.
This parallel between textile and furniture construction highlights that quality is a matter of engineering, not just materials. The table below illustrates this concept by comparing construction methods at common stress points.
| Stress Point | Cheap Construction | Quality Construction |
|---|---|---|
| Garment Crotch Seam | Simple serged seam | Flat-felled with bar tacks |
| Couch Arm Connection | Staples only | Glue, screws, corner blocks |
| Jacket Shoulder | Overlock seam | Taped and pressed-open |
| Failure Rate | Within 12-18 months | 5+ years durability |
The durability of these connections can be scientifically measured. In the textile industry, standardized tests like ASTM D1683 for seam strength and ASTM D4034 for seam slippage quantify a seam’s ability to withstand force. While you cannot perform these tests in-store, their existence proves that garment durability is a science. By examining the construction at stress points, you are performing a visual version of these engineering tests, separating the robust from the flimsy.
What to Remember
- Seam allowance is structural: Aim for 1 to 1.5 inches at key seams like the center back and sides to ensure proper drape and prevent twisting.
- Seam finish dictates durability: Look for robust finishes like French seams for delicate fabrics and reinforced stitching (bar tacks) at stress points like crotches and armholes.
- Shaping matters for fit: For curved figures, princess seams offer a vastly superior and more adaptable fit compared to simple bust darts.
How to Build a Capsule Wardrobe That Lasts 5 Years Without Looking Dated?
The ultimate goal of a capsule wardrobe is not just stylistic cohesion, but longevity. A true capsule piece should last for years, both in terms of style and physical integrity. While timeless design is a key component, the secret to a wardrobe that endures for five years or more lies in its structural quality and, crucially, its adaptability. A garment’s ability to be altered as your body or style preferences evolve is what transforms it from a seasonal item into a long-term investment. This adaptability is determined almost exclusively by its seam allowances.
When selecting pieces for a capsule wardrobe, you must shift your mindset from a consumer to an inspector. You are not just buying a shirt; you are investing in a well-engineered object. Use a simple scoring system to evaluate the “alterability potential” of any prospective piece:
- Score +1 point: More than 1 inch of seam allowance at key seams (center back, side seams).
- Score +1 point: High-quality seam finishes (e.g., French seams, bound edges, flat-felled seams).
- Score +1 point: Presence of a lining with a center-back pleat for alteration ease.
- Score +1 point: High content of natural fibers (wool, cotton, silk) which respond better to tailoring.
A true investment piece for a capsule wardrobe should score at least 3 points on this scale. A piece that scores a 1 or 0 is, by its very construction, disposable. It lacks the internal architecture to be adapted and is therefore not a candidate for a long-lasting wardrobe, no matter how “timeless” its style may seem today.
Quality investment pieces will also offer additional seam allowances to facilitate future alterations, allowing you to customize the fit as your body or style preferences change over time.
– Natalie Tincher, BU Style Quality Assessment Guide
By prioritizing structural integrity and alterability over fleeting trends, you build a collection of garments that are designed to evolve with you. This is the true foundation of a sustainable and satisfying wardrobe.
To build a wardrobe that truly lasts, start applying these principles not as a shopper, but as a structural inspector. Your next purchase should be an investment in quality construction, not a disposable trend.